
TL;DR:
- Repairing a broken string bracelet involves restringing with the correct cord, tying a double surgeon’s knot, and sealing it with jewelry-grade adhesive. Proper technique ensures the bracelet lasts longer by avoiding common mistakes like weak knots, wrong cord thickness, and lack of adhesive reinforcement. Regular maintenance and gentle handling preserve the repair and extend the bracelet’s durability.
Repairing a broken string bracelet means restringing it with the correct cord diameter, tying a secure double surgeon’s knot, and locking that knot with jewelry-grade adhesive. Most string bracelet failures trace back to three fixable mistakes: wrong cord thickness, a weak single overhand knot, and no adhesive reinforcement. Fix all three, and your repaired bracelet will outlast the original. This guide covers the exact materials you need, a step-by-step restringing method, the most common errors to avoid, and how to care for your bracelet once it’s back on your wrist.
What materials do you need to fix a broken string bracelet?
The right materials make the difference between a repair that holds for years and one that snaps again in a week. Gather everything before you start so the process stays clean and controlled.
Cord selection is the most critical choice. A 0.8mm elastic cord is the standard for most bead bracelets because it withstands over 5,000 stretch cycles without fraying. Thinner 0.5mm cord wears out quickly and is not suitable for bracelets with heavier beads. If your bracelet uses very fine beads with small holes, 0.5mm may be the only option that fits, but expect to restring more often.
Here is a quick comparison of common cord options:
| Cord type | Diameter | Best for | Dauerhaftigkeit |
|---|---|---|---|
| Round elastic cord | 0.8mm | Most bead bracelets | Hoch |
| Round elastic cord | 0.5mm | Fine beads, small holes | Moderate |
| Nylon thread | 0.4–0.6mm | Knotted or woven styles | Hoch |
| Waxed cord | 0.5–1mm | Cord and macramé styles | Sehr hoch |
Beyond cord, you need a few more items:
- Jewelry-grade cyanoacrylate adhesive (super glue formulated for jewelry): locks the knot permanently
- Sharp scissors or thread snips: clean cuts prevent fraying at the ends
- Beading needle (optional but helpful): threads cord through tight bead holes
- Ruler or measuring tape: cuts cord to the right length before you start
Profi-Tipp: Cut your cord to your wrist circumference plus 1.5 to 2cm extra. That allowance gives you enough length to tie a secure knot without pulling the bracelet too tight.
How do you restring and knot a broken bracelet step by step?
A clean, ordered process produces a repair that looks professional and holds under daily wear. Follow these steps without skipping the adhesive or the knot-hiding finish.
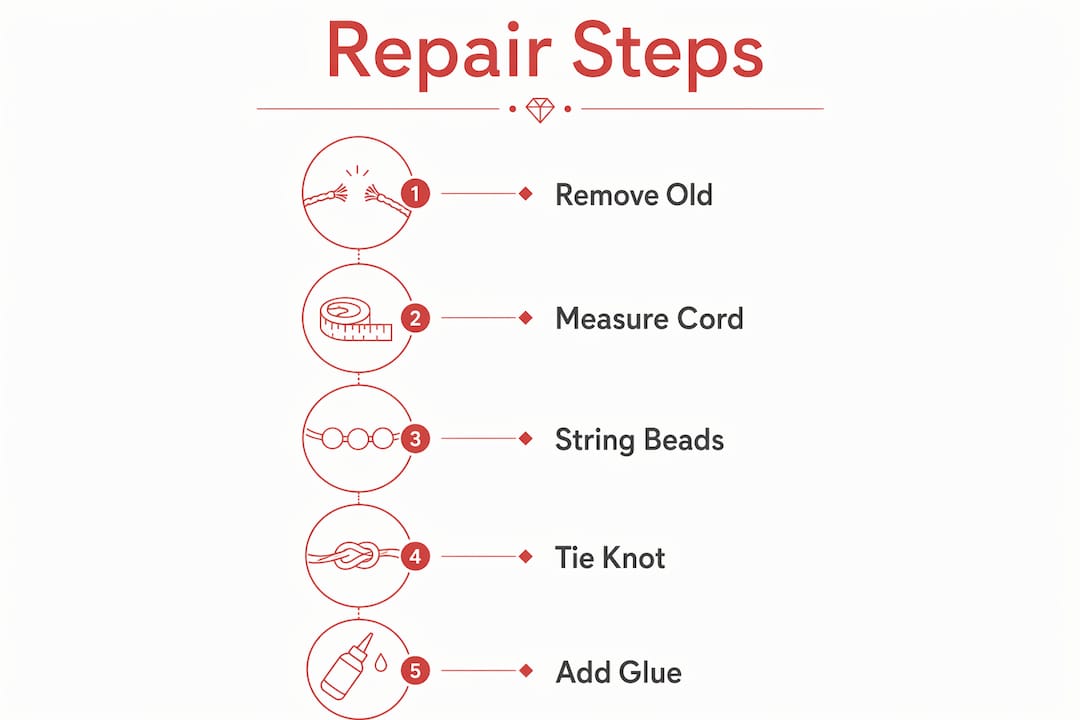
Remove the old cord. Cut the broken cord at the knot and slide all beads off onto a flat surface or tray. Discard the old cord completely. Reusing degraded elastic is the fastest way to repeat the same failure.
Measure and cut new cord. Wrap your measuring tape around your wrist and add 1.5cm for comfort and knot allowance. Cut one clean length of 0.8mm elastic cord at that measurement.
Restring the beads. Thread the cord through each bead in the original order. A beading needle makes this faster when bead holes are tight. Keep one end of the cord anchored under your thumb or taped to the work surface so beads don’t slide off.
Tie the double surgeon’s knot. Die double surgeon’s knot creates two friction points that resist loosening, unlike a single overhand knot which unwinds under tension. Cross the two cord ends, loop twice through the center, then repeat the loop a second time before pulling through.
Apply adhesive before fully tightening. Add one small drop of jewelry-grade cyanoacrylate to the knot while it is still slightly loose. The adhesive penetrates the fibers while wet and locks the knot permanently once you tighten it. Do not apply adhesive after the knot is fully closed.
Tighten with slow, steady tension. Pull both cord ends gradually over about three seconds. Quick yanking generates friction heat that weakens the elastic at the knot point. Slow tension seats the knot cleanly and preserves cord integrity.
Trim and conceal the tails. Trim the excess cord to about 3mm. Use a beading needle or toothpick to tuck the trimmed tails back through the hole of the nearest bead. This hides the knot, prevents irritation on the wrist, and gives the bracelet a finished look.
Here is a summary of the full repair sequence:
| Step | Action | Key detail |
|---|---|---|
| 1 | Remove old cord | Discard completely, do not reuse |
| 2 | Measure and cut | Wrist size plus 1.5–2cm |
| 3 | Restring beads | Use needle for tight holes |
| 4 | Tie double surgeon’s knot | Two loops, two friction points |
| 5 | Apply adhesive | Add before fully tightening |
| 6 | Tighten slowly | Three seconds of steady pull |
| 7 | Trim and hide tails | Thread back through bead hole |
Profi-Tipp: String the beads onto the new cord before tying any knot. Tying first and then trying to thread beads over the knot wastes cord and forces you to cut and start over.
What mistakes cause string bracelet repairs to fail?
The most common bracelet failures come from three sources: wrong cord, weak knot, and missing adhesive. Knowing these pitfalls before you start saves you from redoing the work.
Using cord that is too thin. A 0.5mm cord on a heavy bead bracelet stretches beyond its limit quickly. Match cord diameter to bead weight. When in doubt, go thicker.
Tying a single overhand knot. A single overhand knot has one friction point. Under repeated stretching, it unwinds. The double surgeon’s knot is the correct choice for elastic cord every time.
Yanking the knot tight too fast. Speed creates friction heat at the knot point. That heat degrades elastic fibers and produces a weak spot exactly where you need strength most.
Skipping the adhesive. A knot without adhesive relies entirely on friction. Over time, friction alone is not enough. Cyanoacrylate chemically bonds the fibers and makes the knot permanent.
Not testing the finished knot. Test the knot by gently stretching the bracelet to about 1.5 times your wrist diameter. If the knot shifts or the cord elongates unevenly, untie it and start again before wearing.
“Slow, steady pulling tension during knot tying creates stronger repairs by avoiding friction damage to elastic cord. A knot tightened in three seconds holds far longer than one yanked shut in half a second.”
If your repair fails and you need to undo it, use a straight pin or seam ripper to loosen the knot without cutting the cord. Work slowly from the outside of the knot inward. If adhesive has already cured, cut the cord cleanly and restring with fresh material. Trying to reuse a glued cord wastes time and produces a weaker result.
How do you maintain a repaired string bracelet?
A repaired bracelet needs basic care to stay strong. The cord and knot are the most vulnerable points, so your habits after repair matter as much as the repair itself.
Keep it dry. Water, soap, and sweat degrade elastic cord over time. Remove your bracelet before showering, swimming, or washing dishes.
Avoid UV exposure. Direct sunlight fades cord color and breaks down elastic fibers. Store bracelets away from windowsills and out of direct light.
Store flat or loosely coiled. Hanging a bracelet under its own weight stretches the cord between wearings. A flat jewelry tray or a small pouch keeps tension off the knot.
Check the knot every few weeks. Run your finger over the knot area. If it feels loose, bulging, or gritty, restring before it snaps. Catching wear early prevents losing beads.
Sanft reinigen. Use mild soap and distilled water for at-home cleaning. Avoid ultrasonic cleaners, which damage organic or coated beads. A soft cloth dampened with the solution, wiped along the cord and beads, is all you need.
Profi-Tipp: If your bracelet has natural stone, pearl, or amber beads, never soak it. Wipe each bead individually with a barely damp cloth and let it air dry completely before storing.
For guidance on choosing cord types for longevity, the material you select at the repair stage determines how long you can go between restrings.
Die wichtigsten Erkenntnisse
A successful string bracelet repair depends on three non-negotiable elements: 0.8mm cord, a double surgeon’s knot, and jewelry-grade adhesive applied before the knot is fully tightened.
| Punkt | Details |
|---|---|
| Choose 0.8mm cord | This diameter handles over 5,000 stretch cycles and suits most bead bracelets. |
| Use the double surgeon’s knot | Two friction points prevent slippage that a single overhand knot cannot resist. |
| Apply adhesive before tightening | Cyanoacrylate penetrates the fibers while wet and locks the knot permanently. |
| Test before wearing | Stretch the bracelet to 1.5 times wrist diameter to catch a weak knot early. |
| Maintain after repair | Keep the bracelet dry, stored flat, and check the knot every few weeks. |
Why the knot you choose matters more than anything else
I have seen dozens of bracelet repairs fail within a week, and almost every one came down to the same thing: the wrong knot. People reach for the overhand knot because it is fast and familiar. The problem is that elastic cord under daily tension will work that knot loose in days, sometimes hours.
The double surgeon’s knot changed how I think about string bracelet mending entirely. It is not complicated. It takes maybe 30 extra seconds. But those two friction points hold in a way that a single loop simply cannot match. Pair that with a drop of cyanoacrylate applied at the right moment, and you have a repair that genuinely outlasts the original factory knot.
The other thing I have learned is patience during tightening. Pulling fast feels satisfying. It also destroys the cord at the exact point where you need it strongest. Three slow seconds of steady tension is the whole trick. It is the kind of detail that separates a repair that lasts a week from one that lasts two years.
If you are hesitant about DIY bracelet repair, start with a bracelet that has sentimental but not monetary value. The process builds confidence fast. By the second or third repair, the knot tying feels natural, and you will stop dreading a broken bracelet and start seeing it as a five-minute fix.
For more on handcrafted bracelet techniques that go beyond basic restringing, the methods used by professional makers translate directly into better home repairs.
— Danielius
Quality string bracelets worth repairing
Not every bracelet deserves the same level of care, but a well-made piece always does. Jewelsbyares designs string, thread, and cord bracelets using premium materials and artisanal knotting techniques, which means they hold up longer between repairs and respond well to the methods described here. If you are looking for a replacement piece or want to add something new to your collection, the Jewelsbyares string bracelet collection covers everything from minimalist diamond string styles to bold woven cord designs. Each bracelet ships in gift-ready packaging and is built to be worn daily. For readers who want to go deeper on construction and care, the types of string bracelets guide covers materials, symbolism, and styling in detail.
FAQ
What cord size is best for repairing a string bracelet?
Use 0.8mm elastic cord for most bead bracelets. It handles over 5,000 stretch cycles without fraying, making it the most durable choice for everyday wear.
What knot should I use when repairing a string bracelet?
The double surgeon’s knot is the correct choice. It creates two friction points that resist loosening under tension, unlike a single overhand knot which unwinds with repeated stretching.
Do I need glue to repair a broken string bracelet?
Yes. Apply one drop of jewelry-grade cyanoacrylate to the knot before fully tightening it. The adhesive penetrates the cord fibers and locks the knot permanently once it cures.
How do I know if my repair is strong enough to wear?
Gently stretch the finished bracelet to about 1.5 times your wrist diameter. If the knot shifts or the cord elongates unevenly, untie it and retie before wearing.
How often should I restring a repaired string bracelet?
Check the knot every few weeks for signs of wear, loosening, or fraying. With proper cord, a secure double surgeon’s knot, and adhesive reinforcement, most repairs last well over a year under daily wear.