TL;DR:
- Stackable cord bracelets are crafted by knotting beads onto durable nylon cords, creating a layered, customizable look. Proper sizing, sealing ends, and intentional styling ensure a polished, adjustable bracelet suitable for everyday wear. Mastering one bracelet fully before making a stack helps achieve professional results and a cohesive appearance.
Stackable cord bracelets are multiple thin bracelets worn together on one wrist to create a layered, curated look. They combine simple knotting techniques, beads, and adjustable cord closures to produce stylish, customizable jewelry you can make for under $20. This guide covers everything you need to make stackable cord bracelets from scratch: the right materials, a step-by-step knotting process, styling principles, and finishing techniques that keep your bracelets looking polished for months. Whether you’re crafting for yourself or gifting, the skills here apply to every bracelet in your stack.
What materials do you need to make stackable cord bracelets?
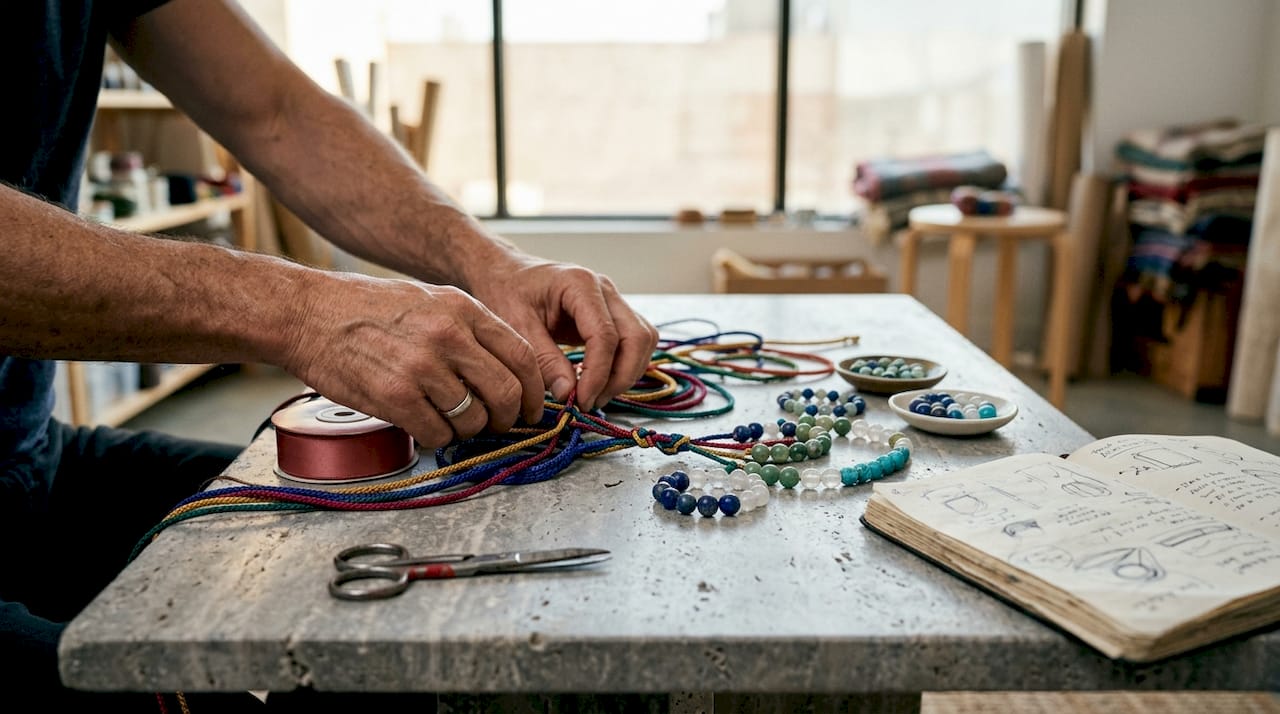
The right cord is the single most important material decision you will make. Braided nylon cord outperforms cotton and silk threads in durability, moisture resistance, and everyday comfort. Waxed nylon is the other top choice: it holds knots firmly, resists fraying, and threads through beads cleanly. Both materials come in a wide range of colors, so your creative options are wide open.
Standard cord thickness for adjustable cord bracelets runs from 1mm to 1.5mm. Thinner cord (1mm) works best for delicate beaded designs. Thicker cord (1.5mm) suits knotted styles where the cord itself is the visual feature. Cut your central cord to about 60cm and your knotting cords to 120–150cm each.
Beads add texture and personality to your stack. For a Shamballa-style knotted bracelet, 6mm beads require 14–16 beads to fit an average wrist comfortably. Choose beads with a hole diameter of at least 2mm–3mm so the cord threads through without forcing. Natural stone, glass, and wood beads all work well and each adds a different visual weight to your stack.
Here is a quick reference for your shopping list:
| Материал | Recommended Spec | Purpose |
|---|---|---|
| Waxed or braided nylon cord | 1mm–1.5mm thickness | Main bracelet structure |
| Central cord | ~60cm per bracelet | Holds beads in place |
| Knotting cord | 120–150cm per bracelet | Forms square knots around beads |
| Beads | 6mm–10mm, 2mm+ hole | Decorative focal points |
| Scissors | Sharp, small blade | Clean cord cuts |
| Lighter | Standard flame | Sealing cord ends |
| Superglue | Gel formula | Securing sliding knots |
| Flat-nose pliers | Optional | Tightening tight knots |
Совет от профессионала: Buy cord in bulk spools rather than pre-cut lengths. A single spool gives you enough material for six to eight bracelets and costs far less per bracelet than packaged sets.
How do you create an adjustable cord bracelet step by step?
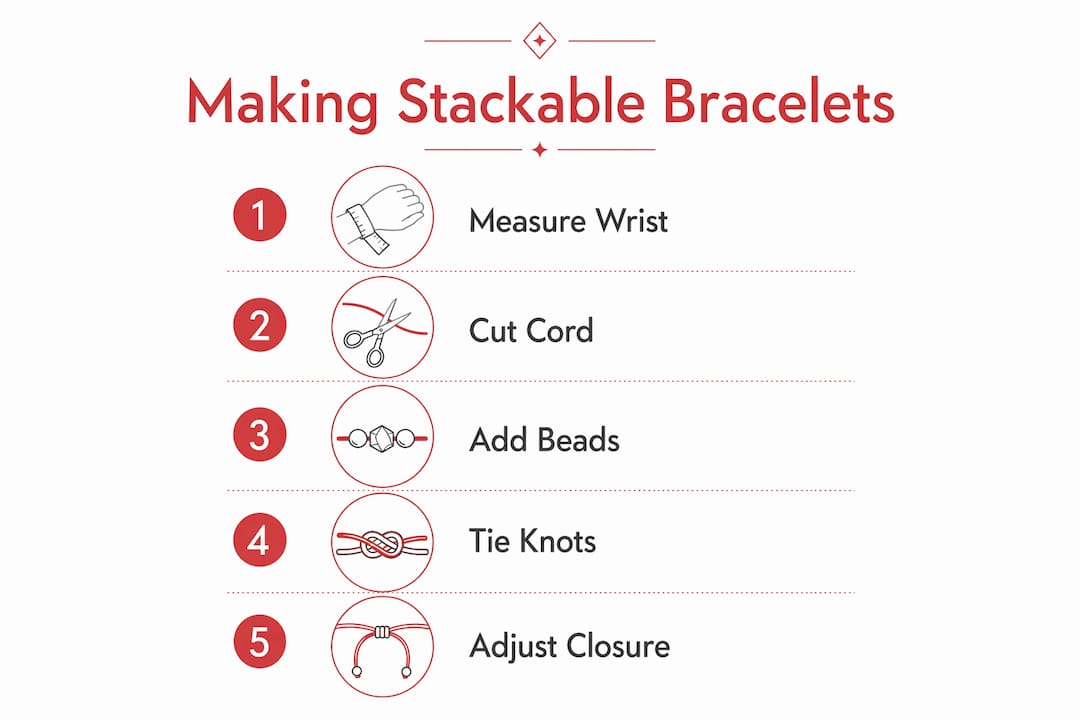
The adjustable sliding knot closure is the technique that makes cord bracelets beginner-friendly and practical. Sliding knot closures eliminate clasps and allow the bracelet to fit most wrist sizes without measuring perfectly every time. The entire process from cutting cord to finished bracelet takes 30–60 minutes for a first-timer.
Follow these steps to build one bracelet:
Measure and cut your cords. Cut one central cord at 60cm. Cut two knotting cords at 120–150cm each. Fold the central cord in half to find its midpoint, then mark it lightly with a pen.
Set up your workspace. Tape the midpoint of the central cord to a flat surface or clip it to a clipboard. This keeps tension consistent while you knot.
Thread your first bead. Slide your first bead to the center of the central cord. Hold it in place with your thumb.
Tie square knots around the bead. Take one knotting cord and cross it over the central cord, then pass the other knotting cord over the first and through the loop. Pull both ends firmly. Repeat on the other side of the bead to lock it in place. This is the square knot technique used in Shamballa-style bracelets.
Add remaining beads. Repeat the threading and square-knotting process for each bead. Leave a small, consistent gap between knots for a clean, even look.
Finish the bracelet ends. Once all beads are knotted, tie off each end of the central cord with a simple overhand knot. Trim excess cord to about 3mm past the knot.
Seal the ends. Briefly touch a lighter flame to each trimmed end. The heat melts the nylon fibers together and prevents fraying. Do not hold the flame too long or the cord will burn rather than seal.
Create the sliding closure. Overlap the two bracelet ends by about 5cm. Take a separate 20cm piece of cord and tie a series of square knots around both overlapping ends. This forms the sliding tube that adjusts the bracelet size. Trim and seal the closure cord ends.
Secure with superglue. Apply a tiny drop of gel superglue to the sliding knot. This prevents the closure from loosening with daily wear.
Совет от профессионала: Measure your wrist circumference and add 1.5cm of ease before setting your bead count. That extra space prevents the bracelet from binding when your wrist swells slightly in warm weather.
How do you style multiple bracelets into a cohesive stack?
Styling a stack is where craft becomes art. Intentional variety is the core principle: mixing textures and thicknesses creates a curated look, while stacking identical bracelets produces visual clutter. Think of your wrist as a composition, not a collection.
A strong starting formula combines one smooth wax cord bracelet, one knotted beaded bracelet, and one chain or metallic element. Each piece occupies a different visual register: smooth, textured, and reflective. That contrast is what makes the stack read as intentional rather than accidental.
Here are the key styling rules to follow:
- Vary your textures. Pair knotted cord with smooth cord, and add a stone or glass bead bracelet for contrast.
- Mix your widths. A thin 1mm cord bracelet next to a wider knotted piece creates visual rhythm.
- Limit your palette. Choose two or three colors that share a tone. Earth tones, jewel tones, and neutrals each work well as a family.
- Balance your lengths. Measure wrist circumference plus 1.5cm ease for each bracelet so the stack sits evenly without one piece riding up.
- Add one statement piece. One bracelet with a larger bead or a distinctive color anchors the stack and gives the eye a place to rest.
- Keep the total count manageable. Three to five bracelets is the sweet spot for most wrists. Beyond five, the stack loses definition.
Stacking cord bracelets with a watch is another strong option. Place the stack on the opposite wrist from your watch for a balanced look, or layer one or two thin cord bracelets between the watch and your wrist for a relaxed, layered feel. For more ideas on pairing, the guide on pairing bracelets with a watch covers the specifics in detail.
How do you finish and care for handmade cord bracelets?
Finishing and care determine how long your bracelets last. The two most common failure points are fraying cord ends and loosening sliding knots. Both are easy to prevent with the right technique applied at the right moment.
Sealing synthetic cord ends with a lighter melts the fibers together, stopping frays before they start. This step also makes threading cord through tight bead holes much easier, since the sealed tip acts like a needle. Apply the flame for one to two seconds only. A longer burn chars the cord and weakens the seal.
Common mistakes and how to fix them:
- Uneven bead spacing. If beads drift, the knots between them were not pulled tight enough. Re-tie the affected knot and pull firmly from both knotting cord ends simultaneously.
- Sliding knot that won’t stay put. Add a second drop of superglue to the closure tube and let it cure for 10 minutes before wearing.
- Cord that snaps at the knot. This usually means the cord was too thin for the bead weight. Switch to 1.5mm cord and re-make the bracelet.
- Beads that spin or slide. Tie a half-hitch knot directly against each bead on both sides to lock it in position.
Совет от профессионала: When finishing a bracelet with a tassel or fringe, cut all fringe strands to the same length before sealing. Then seal each strand individually rather than all at once. This keeps the fringe neat and prevents the strands from fusing together.
For ongoing care, remove cord bracelets before swimming or showering. Water weakens knots over time, even in nylon. Wipe bracelets with a dry cloth after contact with sweat or sunscreen. Store them flat or loosely coiled, not tangled together, to preserve the knot structure. More detailed care guidance is available on the Jewelsbyares jewelry care page.
Основные выводы
The most effective approach to making stackable cord bracelets is to master one adjustable bracelet fully before building a styled set, using braided nylon cord, proper bead sizing, and sealed sliding knot closures.
| Точка | Подробности |
|---|---|
| Choose the right cord | Use 1mm–1.5mm braided or waxed nylon for durability and knot-holding strength. |
| Size your beads correctly | Select beads with a 2mm–3mm hole diameter and use 14–16 beads for 6mm bead styles. |
| Master the sliding knot | Tie square knots around overlapping cord ends and seal with superglue for an adjustable, clasp-free closure. |
| Style with intentional variety | Mix smooth, knotted, and metallic textures; limit your stack to three to five bracelets. |
| Seal every cord end | Use a lighter to melt nylon ends and prevent fraying before and after knotting. |
What I’ve learned from making dozens of cord bracelet stacks
The advice I wish someone had given me early on is this: finish one bracelet completely before starting the next. That sounds obvious, but most beginners cut cord for three bracelets at once, get overwhelmed by the knotting, and end up with a pile of half-finished pieces that don’t work together. Completing one bracelet fully before moving to the next forces you to solve fit and finish problems on a single piece, which makes every subsequent bracelet faster and better.
The other thing I’ve noticed is that color is where most people play it too safe. Earth tones are beautiful, but a single bracelet in a saturated color, deep teal, burnt orange, or cobalt, can anchor a neutral stack and make the whole set feel intentional rather than accidental. Don’t be afraid to make one bracelet that feels bold. It usually becomes the piece people ask about first.
Patience with the sliding knot closure pays off more than any other skill. When that closure is tight, sealed, and smooth, the bracelet feels finished and professional. When it’s loose or uneven, the whole piece feels amateur regardless of how well the beads are knotted. Spend the extra two minutes on the closure every time.
If you want to see how professional cord bracelet construction translates into finished pieces, the handcrafted bracelet techniques guide from Jewelsbyares is worth reading alongside your own practice. Seeing the standard you’re working toward sharpens your eye for what “finished” actually looks like.
— Даниэлюс
Handcrafted cord bracelets worth adding to your stack
Making your own bracelets is deeply satisfying. Sometimes, though, you want a piece that sets the standard for everything else in your stack. Jewelsbyares crafts premium cord and string bracelets using ethically sourced materials and artisanal knotting techniques, producing pieces that hold up to daily wear and look genuinely refined. Their cord bracelet collection is designed specifically for stacking, with consistent sizing and a range of textures that pair naturally with handmade pieces. Whether you’re filling a gap in your stack or looking for a gift that arrives in elegant packaging, Jewelsbyares offers options that complement the bracelets you make yourself.
ЧАСТО ЗАДАВАЕМЫЕ ВОПРОСЫ
What cord is best for stackable bracelets?
Braided or waxed nylon cord in 1mm–1.5mm thickness is the best choice. It holds knots firmly, resists moisture, and lasts longer than cotton or silk alternatives.
How long does it take to make one cord bracelet?
A beginner can complete one adjustable cord bracelet in 30–60 minutes. The sliding knot closure and bead knotting take the most time on the first attempt.
How many bracelets make a good stack?
Three to five bracelets is the ideal range for most wrists. That number creates a layered look without losing definition or becoming uncomfortable.
How do you keep a sliding knot from loosening?
Apply a small drop of gel superglue to the sliding knot after tying it and let it cure for 10 minutes. This locks the closure without making it permanently fixed.
Can you mix cord bracelets with other jewelry in a stack?
Yes. Mixing cord bracelets with chain or metallic elements adds contrast and makes the stack look more curated. Place the cord bracelets closest to the wrist and the chain or bead pieces toward the outer edge for the most balanced result.